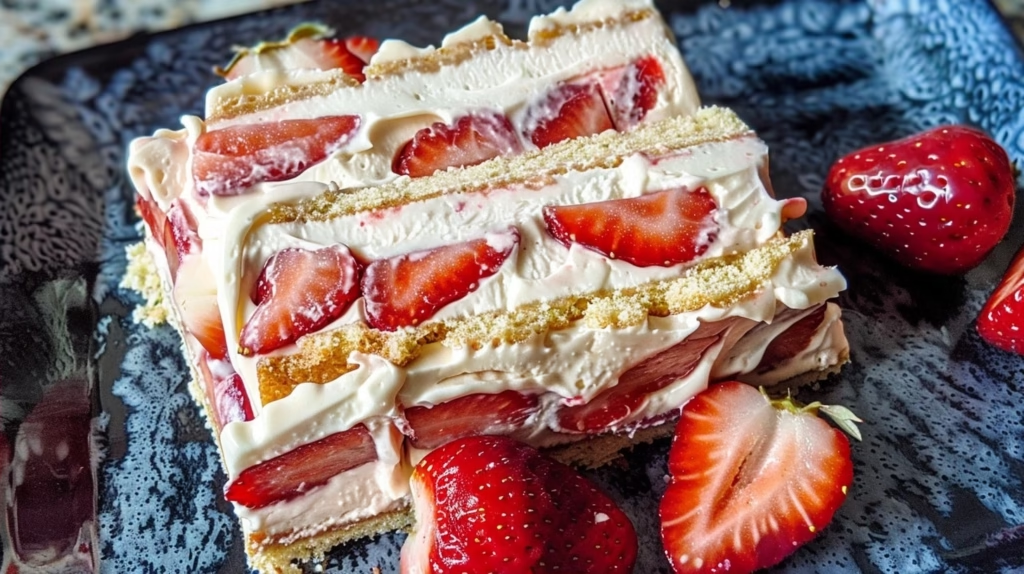
An easy Strawberry Icebox Cake serves as a refreshing no-bake dessert that combines sweet macerated fruit with creamy layers and delicate vanilla wafers. This classic refrigerator cake relies on time to soften the cookies into a cake-like texture while the fresh strawberry compote provides a vibrant burst of natural flavor. It remains a perfect choice for warm weather gatherings where turning on the oven is simply not an option for the cook.
Introduction to Easy Strawberry Icebox Cake
The texture of this dessert is a harmonious blend of cloud-like whipped cream and softened vanilla wafers that dissolve gently on the tongue. Each bite offers a bright contrast between the deep sweetness of the strawberry compote and the subtle floral notes of pure vanilla bean paste. The aroma is incredibly inviting, reminiscent of early summer mornings spent picking berries in a sun-drenched patch behind the family home. You will appreciate how the flavors meld together over time to create a sophisticated treat that feels much more complex than its humble origins suggest.
Historically, icebox cakes gained popularity in the early twentieth century as domestic refrigeration became accessible to households across the globe. Unlike traditional cakes that require chemical leaveners and high-heat baking, this method uses a physical transformation process called osmosis to create structure. It stands out from modern recipes by focusing on pure ingredient quality rather than relying on heavy additives or stabilizers found in processed dessert mixes. By choosing this approach, you are participating in a long culinary tradition of creating elegance through patience and high-quality seasonal produce.
This recipe suits busy home cooks who need a reliable dessert for potlucks, birthday celebrations, or spontaneous backyard weekend dinners with close friends. Because it requires zero oven time and relies entirely on chilling, it acts as a stress-free solution for anyone managing a hectic schedule during the week. Once you master the basic assembly, you will find it deserves a permanent place in your recipe box for its sheer convenience and crowd-pleasing appeal. Whether you serve it to children or adults, the combination of strawberries and cream never fails to elicit genuine smiles of appreciation from every guest.
Why You’ll Love This Recipe
The star ingredient here is undoubtedly the fresh strawberry compote which concentrates the berry flavor through careful reduction and natural maceration. By simmering the fruit gently, you transform plain strawberries into a rich, syrupy sauce that permeates the entire structure of the cake with intense fruit essence. This technique ensures that every single bite delivers a consistent punch of flavor that keeps the palate interested and refreshed throughout the entire dessert.
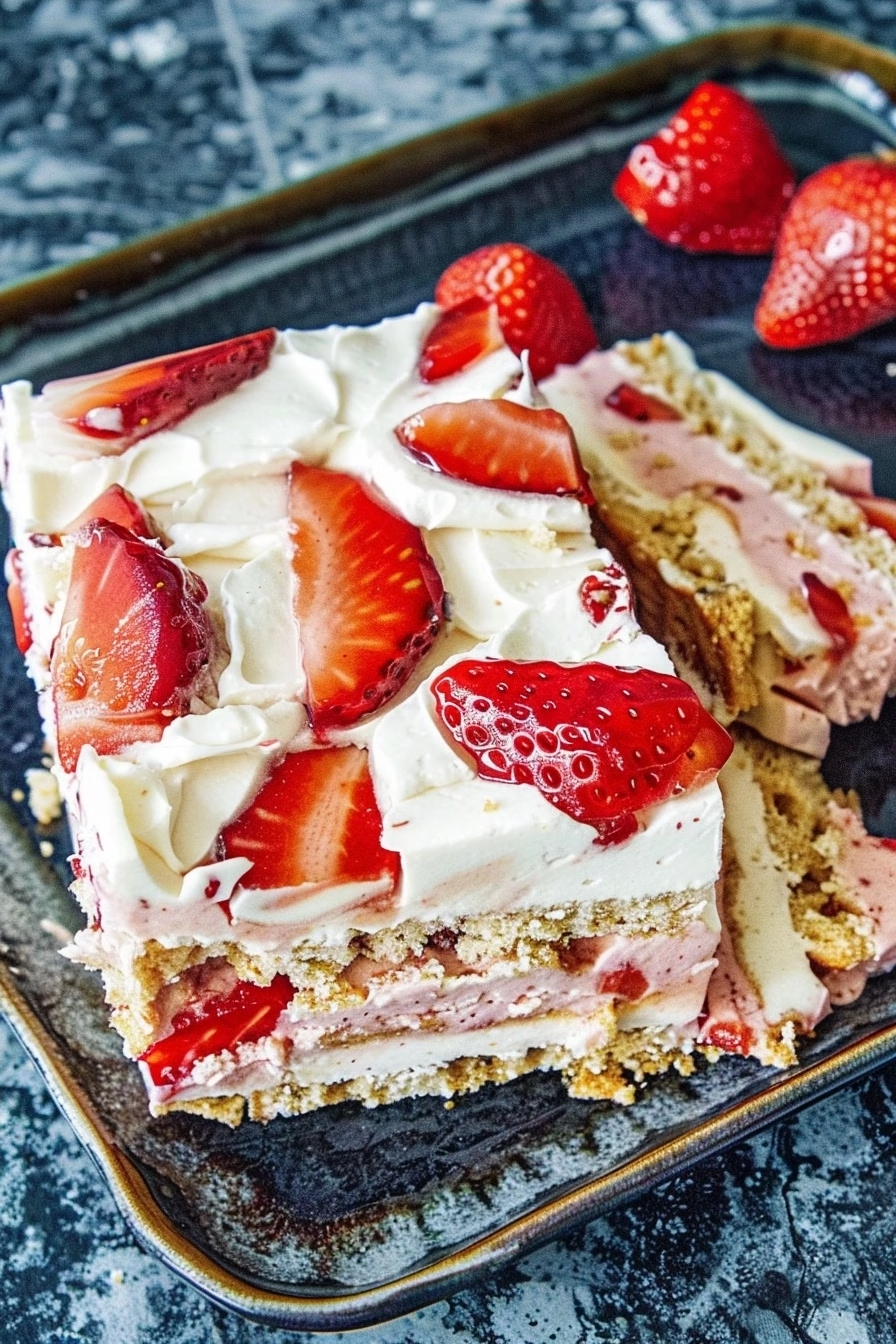
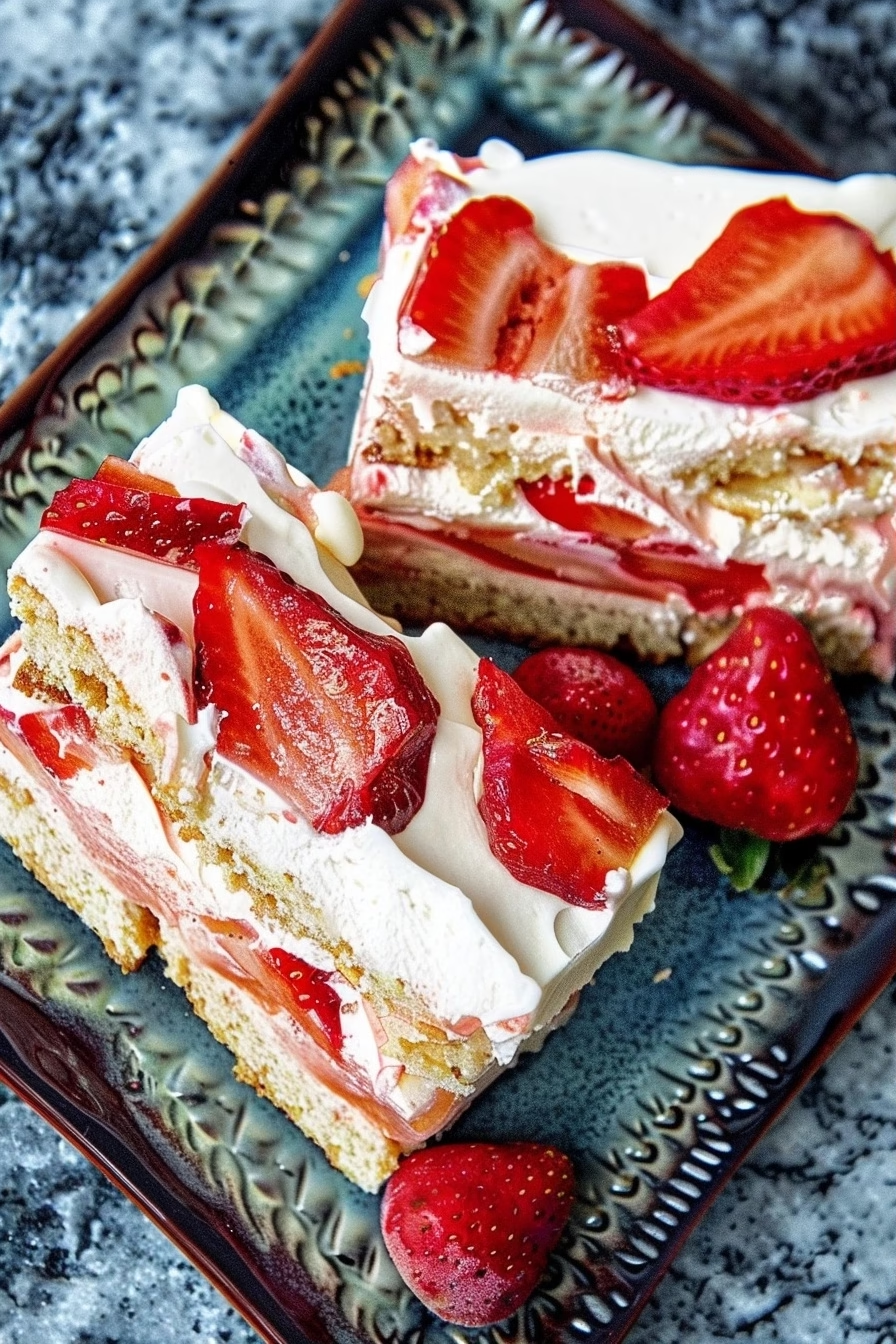
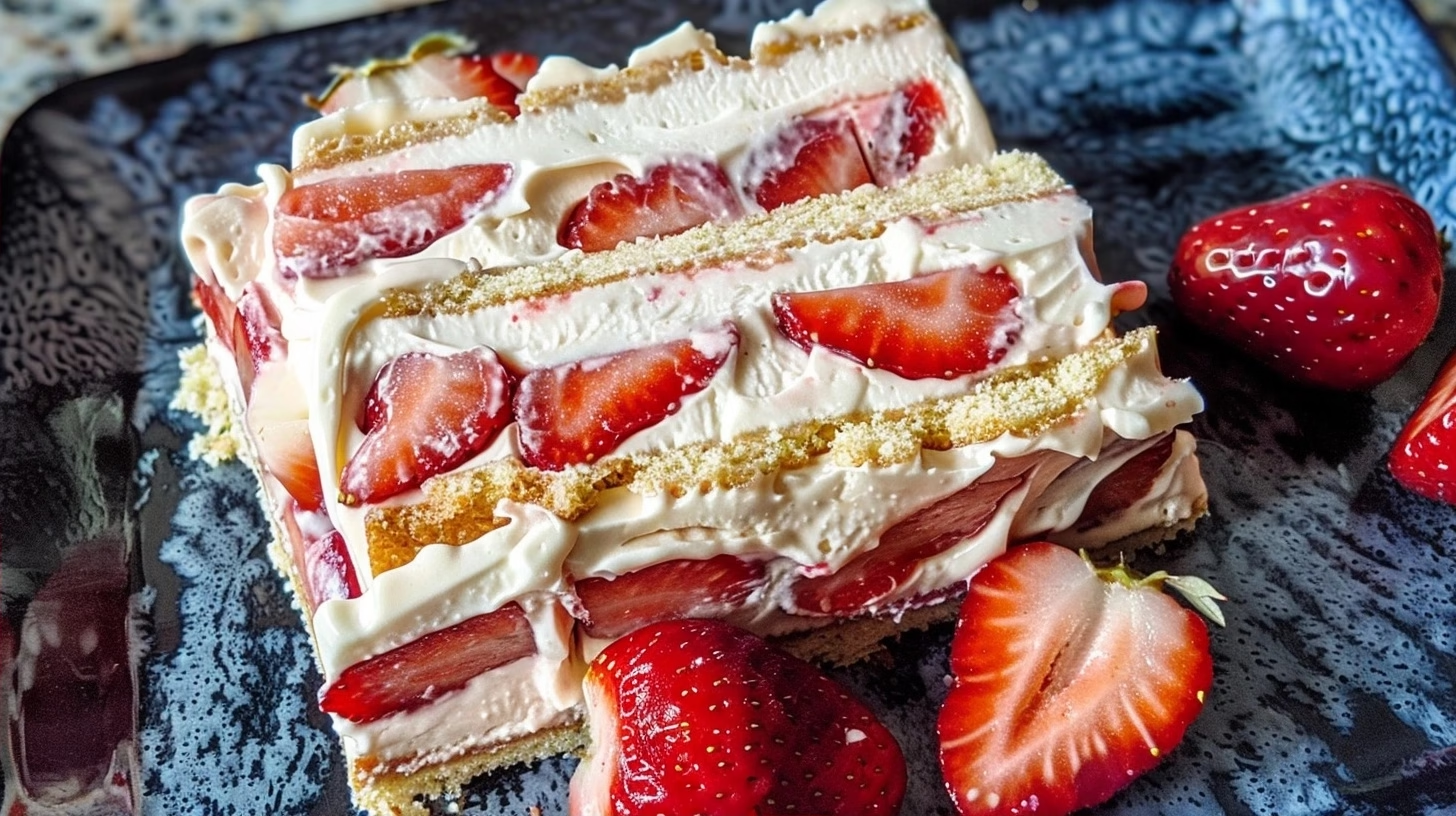
Beyond the flavor, the texture contrast between the crisp initial wafers and the final cake-like consistency is truly magical and uniquely satisfying. The visual appeal of the sliced strawberries pressed against the side of the pan creates a bakery-style look that hides the simplicity of the assembly process. You will enjoy how this dish hits multiple sensory notes at once, proving that high-end dessert results do not always require complicated techniques or expensive specialized kitchen equipment.
The Perfect Weeknight Dinner
This recipe prioritizes efficiency and requires only forty-five minutes of active work before the cooling process handles the rest of the heavy lifting. You can easily prep the components during a lunch break or immediately after work, knowing the cake will be ready to serve the following evening. By keeping the steps streamlined and intuitive, the entire process feels less like a chore and more like a meditative act of culinary creation.
Busy families will appreciate how this dish functions as an ideal make-ahead component for any mid-week gathering where time management is absolutely essential. You can safely store the assembled cake in the refrigerator for up to twenty-four hours, meaning your final prep work is nonexistent when guests actually arrive. Beginners will find the lack of complex chemistry, such as tempering eggs or folding delicate sponges, a massive relief compared to traditional baking projects.
Ingredients Needed for Easy Strawberry Icebox Cake
Main Ingredients
Gather these specific high-quality ingredients to ensure the best possible flavor profile and structural integrity for your beautiful, no-bake icebox cake masterpiece.
| Ingredient | Quantity | Notes |
|---|---|---|
| Strawberries | 1 1/2 pound | Provides base fruit flavor |
| Granulated Sugar | 3 tablespoons | Sweetens and draws out juices |
| Lemon Juice | 1 tablespoon | Balances the berry sweetness |
| Heavy Cream | 1 1/2 cups | Adds rich creamy texture |
| Vanilla Paste | 1 1/2 teaspoons | Provides aromatic warmth |
| Powdered Sugar | 1 tablespoon | Stabilizes the whipped cream |
| Kosher Salt | 1/4 teaspoon | Enhances overall flavor depth |
| Vanilla Wafers | 40 cookies | Forms the cake structure |
Optional Add-Ins
Customization allows you to tailor the sweetness and texture profile of this cake to your specific personal preferences for any special occasion. These simple additions can elevate the presentation or add an interesting crunch that pairs well with the soft layers of cream and macerated fruit.
| Ingredient | Quantity | Notes |
|---|---|---|
| White Chocolate Shavings | 1/4 cup | Adds creamy sweet contrast |
| Fresh Mint Leaves | 1 small bunch | Provides herbal color pop |
| Crushed Pistachios | 2 tablespoons | Adds savory earthy crunch |
| Lemon Zest | 1 teaspoon | Adds bright citrus aroma |
Ingredient Substitutions
- Vanilla Wafers: Substitute with graham crackers to provide a heartier, less sweet base that holds up slightly longer in the refrigerator over time.
- Heavy Cream: Use full-fat coconut cream to create a dairy-free version that maintains a luxurious mouthfeel without needing traditional heavy whipping cream.
- Granulated Sugar: Use honey or maple syrup to provide a deeper floral sweetness that pairs exceptionally well with the natural tang of the strawberries.
- Lemon Juice: Substitute with lime juice if you prefer a sharper, more tropical acidity that cuts through the richness of the whipped cream layers.
Step-by-Step Cooking Instructions
Following these sequential stages ensures that your flavors develop correctly while maintaining the delicate structure required for a clean, bakery-quality slice. Focus on the visual cues like color changes and thickening textures to guide your progress through the assembly process.
Preparing the Strawberry Compote
Toss your quartered strawberries with the granulated sugar in a large bowl and allow them to sit until natural juices begin to pool at the bottom. Once macerated, strain the berries and combine them with the lemon juice in a medium saucepan set over medium heat. Cook the mixture until the fruit softens and creates a vibrant, glossy, deep red syrup that smells like intense summer berries. Chill this compote over an ice bath for thirty minutes to ensure it does not melt the whipped cream during the assembly of your cake.
Making the Stabilized Whipped Cream
Combine your heavy cream, vanilla paste, powdered sugar, and kosher salt in the bowl of a stand mixer fitted with the whisk attachment. Beat the mixture on medium-high speed until it reaches medium-stiff peaks, which should hold their shape without drooping off the whisk. The cream should look smooth, glossy, and feel light but substantial enough to hold the weight of the cookie layers. Watch closely to avoid over-whipping, as the texture should remain buttery rather than turning into thick, grainy butter.
Assembling the Layers
Line a loaf pan with plastic wrap to ensure easy removal after the chilling process is complete and the cake has set. Spread a base layer of whipped cream, then arrange eight vanilla wafers before lining the sides with sliced strawberries held flush against the pan. Spoon a layer of your cooled compote over the cookies and repeat this process until you have four distinct layers of cookies and cream. Press plastic wrap against the surface and refrigerate for at least six hours to allow the wafers to soften into a cake-like consistency.
Pro Tips
Achieving the perfect slice requires attention to the small details during the initial assembly and the final freezing stage before you portion the dessert. Following these specific steps will prevent common issues like crumbly layers or uneven strawberry placement that can distract from the visual beauty of the cake.
- Use fresh, firm strawberries for the perimeter slices because they hold their shape better against the pan walls than softer or overripe berries. This ensures your cake looks professional when you unmold it after the chilling period is complete.
- Always use a hot knife to cut the cake because the heat allows the blade to glide through the cold layers without dragging. If you skip this step, you might end up with messy, compressed layers instead of clean slices.
- Ensure the compote is completely chilled before touching the whipped cream, as heat will deflate the airy structure of your cream instantly. A cold compote helps the whipped cream maintain its volume throughout the long resting period in the refrigerator.
- Press the plastic wrap firmly against the top layer of cream to prevent a film from forming or freezer odors from infiltrating the cake. This barrier protects the delicate flavors and maintains the pristine appearance of the top layer during the storage period.
- Let the frozen cake sit at room temperature for five minutes before serving to ensure the texture is soft and creamy rather than icy. Skipping this softening period can lead to a less pleasurable eating experience where the flavors are muted by the cold temperature.
The single most important technique in this recipe involves the proper maceration and reduction of the strawberry compote to achieve the right viscosity. If the compote is too thin, it will leach liquid into the cake and cause the delicate vanilla wafers to dissolve into mush rather than maintaining a cake-like structure. Take your time during the simmering process to ensure the moisture evaporates enough to create a thick, jammy consistency that holds the cake together perfectly.
Serving Suggestions and Variations
Pairing with Sides
This cake pairs exceptionally well with a side of tart lemon sorbet or a simple bowl of fresh seasonal berries to echo the primary flavor profile. For a balanced menu, consider serving this as a finale to Roasted Vegetable Quinoa Salad to keep the meal light and refreshing. A cup of hot green tea or chilled hibiscus lemonade also serves as a perfect beverage accompaniment, as these drinks do not overpower the delicate sweetness of the strawberry cake. The light nature of these pairings ensures that your guests finish the meal feeling satisfied but not weighed down by heavy dessert ingredients.
Creative Variations
For a spicy kick, fold a pinch of freshly ground black pepper into your strawberry compote while it simmers to provide an unexpected, sophisticated bite. The heat from the pepper interacts beautifully with the natural sweetness of the berries and the fat content of the cream. You can also add a teaspoon of fresh grated ginger to the compote if you prefer a warming, aromatic depth that pairs perfectly with the vanilla.
Swap the vanilla wafers for thin, crispy ginger snaps to introduce a bold, spicy, and crunchy element that changes the character of the dessert significantly. This variation works especially well during the autumn months when you crave slightly more robust and complex spice profiles. You could even use coconut macaroons for a chewy, tropical twist that adds a dense texture and subtle nutty notes to every single bite.
If you enjoy this recipe, try our other favorites such as the Classic Lemon Icebox Pie or the decadent Dark Chocolate Berry Mousse. These recipes rely on similar assembly techniques that minimize your time in the kitchen while maximizing the final result. For a truly elegant finish, serve your finished slice with a dollop of fresh Homemade Chantilly Cream on the side to round out the flavor experience.
Nutritional Information
These values are approximate per serving and are calculated based on standard ingredients used in the provided instructions for this specific dessert.
| Nutrient | Amount per Serving |
|---|---|
| Calories | 310 |
| Protein | 3g |
| Fat | 18g |
| Carbohydrates | 35g |
| Fiber | 2g |
| Sugar | 24g |
| Sodium | 110mg |
These are approximate values and may vary depending on specific ingredients used.
FAQ
Can I substitute frozen strawberries for fresh ones?
You can absolutely use frozen strawberries for this recipe without sacrificing the final quality of the compote. Ensure you thaw the berries completely and drain any excess liquid before you begin the maceration process with the sugar. Frozen berries are often picked at peak ripeness, which can actually provide a more consistent flavor profile throughout the entire year. Follow the exact same simmering instructions as you would with fresh fruit to reach the perfect jammy consistency.
How can I make this recipe dairy-free?
To make a dairy-free version, use full-fat canned coconut milk that has been chilled overnight to separate the solid cream from the liquid. Whip the solid coconut cream using the exact same method as the heavy cream to achieve the necessary fluffy consistency. Ensure your vanilla wafers are also dairy-free, as many commercial brands contain butter or milk products in their ingredient lists. This modification works perfectly and provides a slight coconut undertone that pairs beautifully with the sweet strawberry compote.
How long can I store this cake in the refrigerator?
You can store this cake in the refrigerator for up to twenty-four hours to maintain the best possible texture and flavor intensity. Beyond twenty-four hours, the vanilla wafers may absorb too much moisture and lose their structural integrity, resulting in a less defined appearance. If you need to keep the cake for a longer period, it is much better to freeze it instead of refrigerating it. Simply wrap it well in plastic wrap to protect against freezer burn and keep the quality high.
Can I assemble this dessert a day in advance?
Assembling the cake one day in advance is actually the recommended strategy to ensure the wafers soften into the perfect cake-like consistency. The resting period allows the moisture from the compote and the whipped cream to migrate into the wafers properly. By preparing it the day before, you also save yourself significant stress on the actual day of your event or dinner. Just make sure the cake remains tightly wrapped to keep it fresh and prevent it from absorbing any unwanted refrigerator odors.
Why did my cake layers turn mushy?
The most common cause for mushy layers is either an under-reduced compote or allowing the cake to sit in the refrigerator for too long. Ensure that you cook the compote until it is thick and syrupy to remove as much excess water as possible before assembly. If the compote is too thin, the excess liquid acts as a solvent rather than a layer, causing the wafers to disintegrate completely. Always follow the refrigeration guidelines to ensure the texture stays firm enough to hold the beautiful shape of the layers.
Easy Strawberry Icebox Cake
Ingredients
Method
- Combine sliced strawberries, granulated sugar, and vanilla bean paste in a bowl and let sit for 30 minutes until juices release.
- Strain the berries, reserving the liquid syrup.
- In a large chilled bowl, whip the heavy cream and powdered sugar until stiff peaks form.
- Fold 1/2 cup of the strawberry mixture into the whipped cream.
- Spread a thin layer of whipped cream on the bottom of an 8x8 inch square dish.
- Arrange a single layer of vanilla wafers over the cream.
- Spread a layer of the strawberry-whipped cream over the wafers and drizzle with some reserved strawberry syrup.
- Repeat layers until all ingredients are used, ending with a layer of cream.
- Top with remaining strawberry pieces.
- Cover and refrigerate for at least 6 hours, preferably overnight, until cookies are soft.