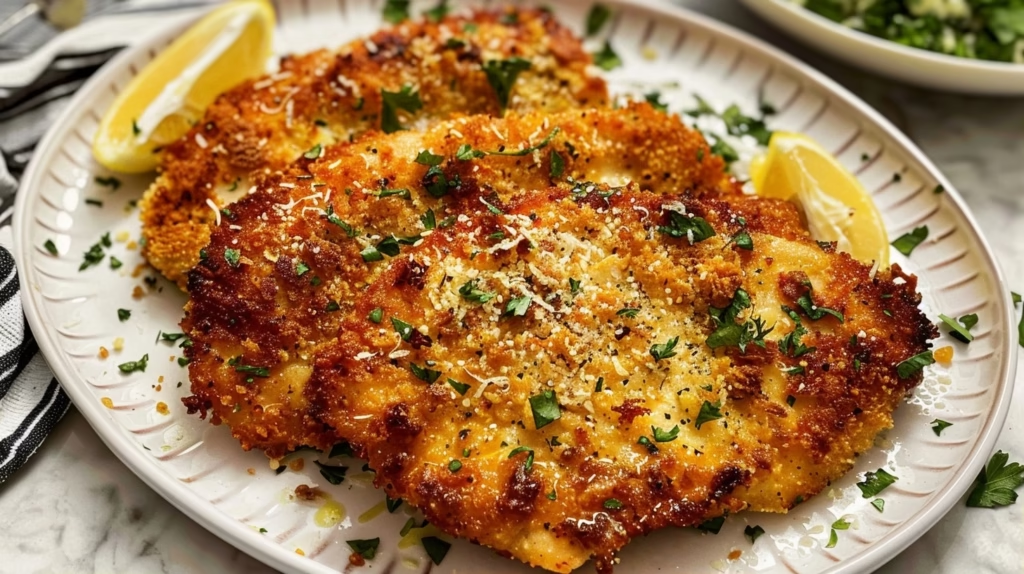
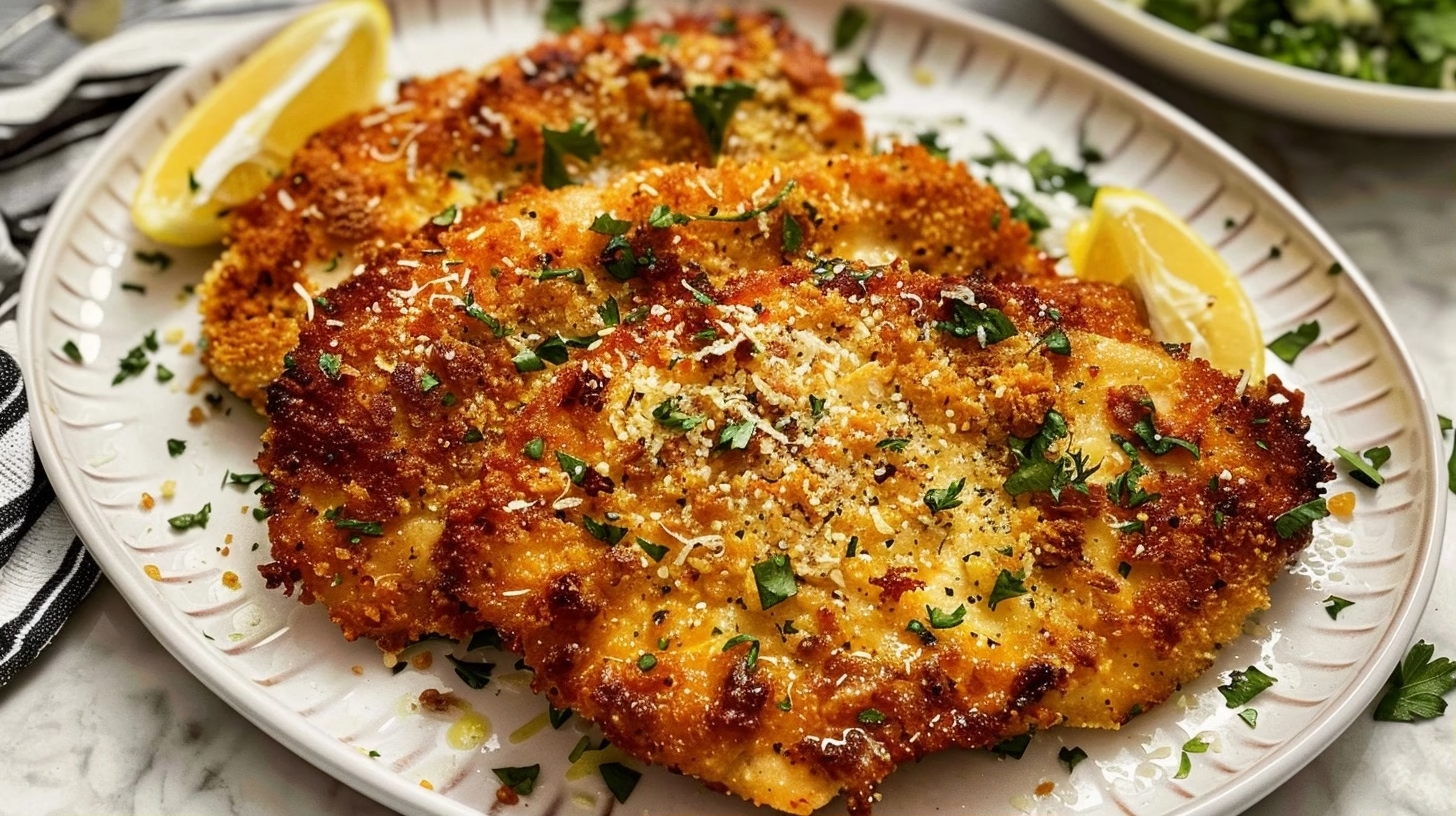
Crispy Parmesan Crusted Chicken is a savory, golden-brown poultry dish featuring a crunchy panko and aged cheese coating fried until perfect. This meal delivers an incredibly satisfying crunch in every single bite, making it an ideal choice for busy families needing a reliable dinner. Home cooks will find this preparation method produces professional restaurant-quality results consistently using basic pantry staples found in every kitchen.
Introduction to Crispy Parmesan Crusted Chicken
This dish features thin, tender chicken breasts encased in a golden, crispy shell that provides a delightful textural contrast to the juicy interior meat. The combination of savory panko breadcrumbs and nutty parmesan cheese creates a rich, umami-packed crust that browns beautifully when pan-fried in high-quality olive oil. Aromatics like kosher salt and black pepper enhance the natural flavor of the poultry while ensuring the crust remains perfectly seasoned and fragrant throughout the entire cooking process. Every bite offers a satisfying crunch that yields to succulent chicken, making it a comfort food staple that appeals to both children and adults during hectic weeknights.
Historically, breaded cutlets like this have been a cornerstone of home cooking across various cultures because they provide an accessible way to elevate simple chicken breasts into a memorable meal. Unlike deep-fried alternatives that can feel overly heavy or greasy, this skillet-fried approach uses just enough oil to achieve a crisp finish while keeping the integrity of the coating intact. This specific technique stands out because the dual-layer breading process ensures the crust adheres firmly to the meat without falling off during the flipping process. By focusing on uniform thickness and proper heat management, this recipe bridges the gap between basic weeknight sustenance and sophisticated culinary technique for the modern home cook.
This recipe is designed for anyone who desires a delicious, reliable meal that requires minimal cleanup and uses easily accessible ingredients found in any local grocery store. It works perfectly for busy professionals needing a quick dinner solution, parents managing active households, or beginner cooks looking to master a foundational pan-searing technique. Because this dish pairs effortlessly with almost any vegetable or starch, it deserves a permanent place in your weekly meal rotation as a versatile and crowd-pleasing protein option. Once you experience the ease of preparing this restaurant-favorite at home, you will likely find yourself coming back to this reliable method time and time again for guests or simple family dinners.
Why You’ll Love This Recipe
The standout feature of this recipe is the marriage of panko breadcrumbs and finely grated parmesan cheese which creates an unparalleled crispness that stays crunchy longer than standard breading. This combination yields a savory, golden crust that seals in the natural juices of the chicken while providing a sharp, salty punch of flavor in every single bite. You will appreciate how the high heat of the skillet transforms these simple ingredients into a luxurious, satisfying crust that looks and tastes like something from an upscale bistro.
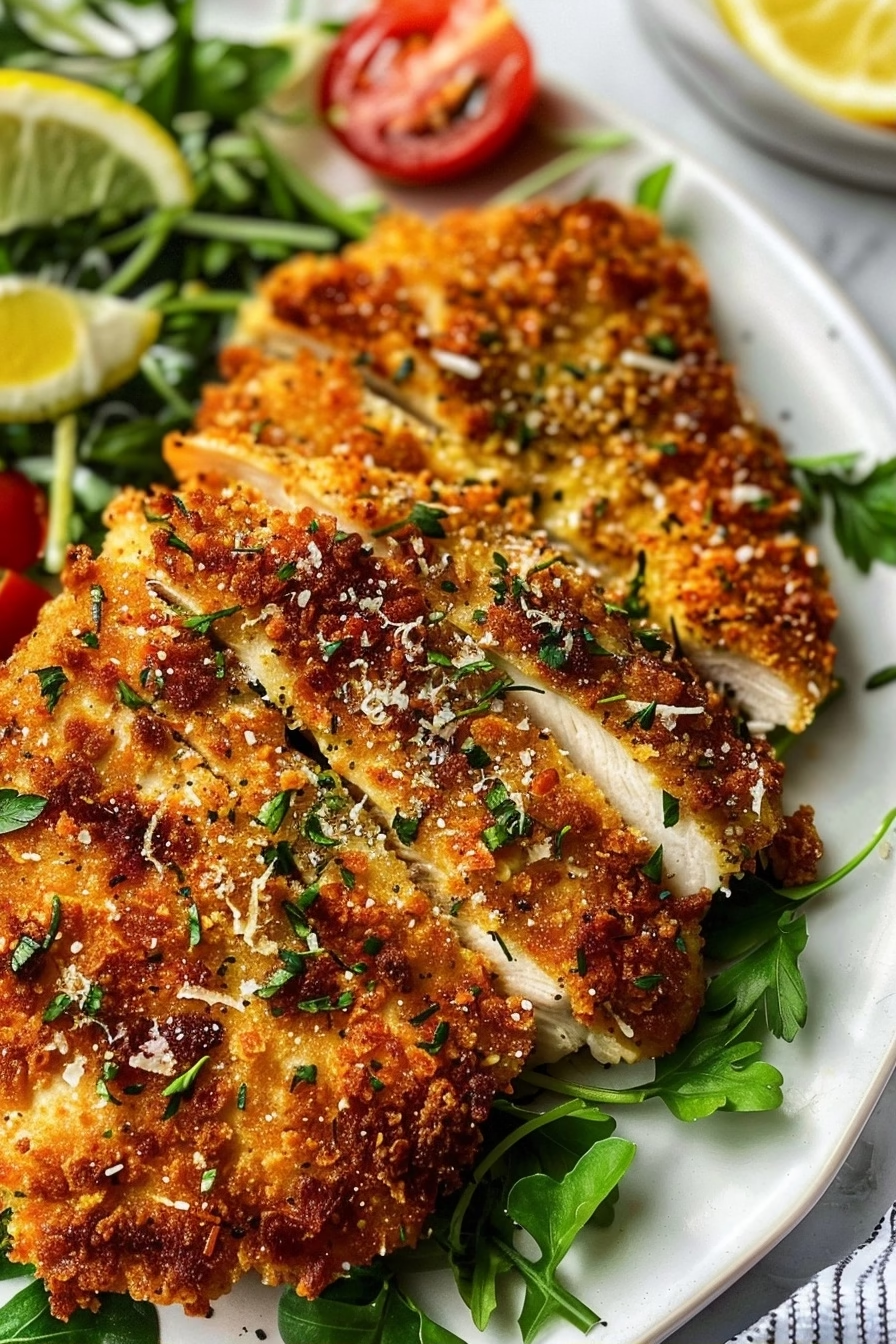
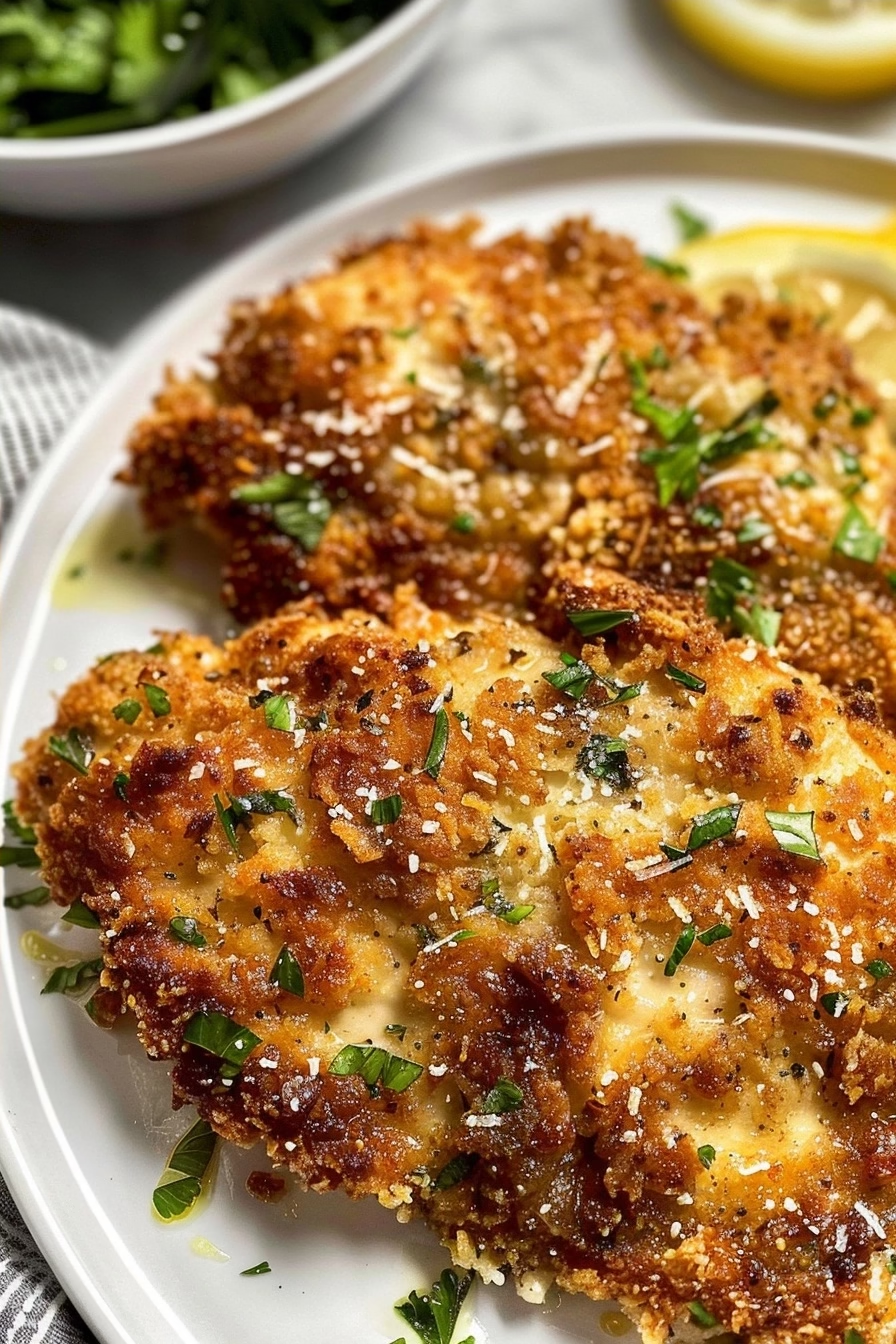
You will enjoy the striking visual appeal of the golden-brown crust against the white, tender interior of the succulent chicken breasts once they are sliced for serving. This recipe satisfies on multiple levels by combining a crave-worthy texture with a clean, wholesome protein base that leaves you feeling full and completely satisfied. The way the cheese melts into the panko mixture creates a cohesive, flavorful shell that elevates this simple dish into something truly special for your dinner table.
The Perfect Weeknight Dinner
Achieving a gourmet-style dinner is remarkably simple with this recipe as it is ready to serve in under forty-five minutes from start to finish. The process requires only a few straightforward steps, allowing you to prepare a high-quality, protein-rich meal without spending your entire evening standing over a hot stove. By keeping your workspace organized and utilizing the dredging station efficiently, you can streamline the entire cooking process to ensure a stress-free experience for any home cook.
This preparation method is ideal for meal prep enthusiasts, busy parents juggling after-school activities, or beginner cooks who want to build confidence in the kitchen through repeatable success. You can easily prep the chicken cutlets in advance and keep them chilled until you are ready to apply the breading and cook them fresh for dinner. The consistent results and minimal equipment requirements make this a perfect baseline recipe that you can master in a single evening, providing a reliable fallback for those nights when time is short.
Ingredients Needed for Crispy Parmesan Crusted Chicken
Main Ingredients
These essential components form the foundation of this savory, crispy chicken dish, ensuring each component serves a specific purpose in building the final flavor and texture profile.
| Ingredient | Quantity | Notes |
|---|---|---|
| Chicken breasts | 4 breasts | The primary protein source |
| All-purpose flour | 1/4 cup | Creates a base for adhesion |
| Large eggs | 2 units | Acts as the binder for crust |
| Panko breadcrumbs | 1 cup | Provides the primary crunch |
| Italian breadcrumbs | 1/4 cup | Adds savory herbal notes |
| Grated parmesan | 1/2 cup | Adds saltiness and richness |
| Olive oil | 1/3 cup | Used for pan-frying/browning |
| Kosher salt/pepper | To taste | Used for overall seasoning |
Optional Add-Ins
Customizing your breading mixture is an excellent way to introduce new flavor profiles while maintaining the essential structural integrity of the crispy crust you have come to love. Experimenting with these additions allows you to adapt the meal to your specific palate preferences or to utilize fresh ingredients you might have currently sitting in your kitchen pantry.
| Ingredient | Quantity | Notes |
|---|---|---|
| Garlic powder | 1 teaspoon | Enhances savory depth |
| Dried oregano | 1/2 teaspoon | Adds Mediterranean aromatics |
| Red pepper flakes | 1/4 teaspoon | Introduces a gentle heat |
| Lemon zest | 1 tablespoon | Brightens the overall flavor |
Ingredient Substitutions
- Panko breadcrumbs: Substitute with crushed cornflakes for a lighter, extra-crunchy texture that adds a subtle sweetness to the dish.
- All-purpose flour: Use gluten-free all-purpose flour blends to easily make this entire recipe compliant with dietary restrictions without sacrificing performance.
- Olive oil: Swap for avocado oil if you need a higher smoke point during the pan-frying process to prevent any unwanted burning.
- Chicken breasts: Replace with thinly sliced turkey cutlets for a leaner alternative that mimics the original texture and cook time closely.
Step-by-Step Cooking Instructions
This method focuses on creating a uniform thickness for the protein to ensure even cooking while developing a perfectly golden, crispy exterior. By following these structured phases, you will master the art of the perfect pan-fried chicken cutlet every single time you cook it.
Preparing the Protein
Begin by covering each chicken breast with a sheet of plastic wrap on a clean cutting board to prevent any cross-contamination during the process. Use a heavy meat mallet or a sturdy rolling pin to gently pound the chicken until it reaches a uniform thickness of approximately one-quarter inch. This step is critical because uneven chicken will cook at different rates, leading to dry spots and undercooked areas in the center of the meat. Remove the plastic wrap and season the flattened chicken liberally on both sides with kosher salt and ground black pepper before setting them aside on a plate.
Dredging and Breading
Arrange three shallow bowls or large plates in a line to create an efficient dredging station for your seasoned chicken breasts. Place the flour in the first bowl, whisk the eggs until smooth in the second, and combine the panko, breadcrumbs, and parmesan in the third bowl. Dredge each piece of chicken lightly in flour, ensuring you shake off any excess to avoid a gummy texture under the final crust. Dip the floured chicken into the egg wash, then press it firmly into the parmesan breadcrumb mixture to ensure the coating adheres completely to the surface for maximum crunch.
Pan-Frying to Perfection
Heat a large nonstick skillet over medium-high heat and add enough olive oil to coat the bottom of the pan evenly for effective searing. Once the oil shimmers, carefully place two chicken breasts into the skillet, ensuring they have enough room to brown without steaming against each other. Cook each side for two to three minutes until the crust turns a deep, golden brown and the interior is fully cooked and opaque throughout. Remove the finished chicken to a rack or plate, add the remaining oil if needed, and repeat the cooking process with the final two breasts before serving immediately.
Pro Tips
Mastering this recipe requires attention to detail during the breading and frying stages to ensure the most flavorful and consistent results possible for your dinner. These tips will help you avoid common mistakes and elevate your cooking skills while producing a truly professional-grade dish right in your own home kitchen.
- Always ensure your chicken breasts are pounded to an even thickness to guarantee that all pieces finish cooking at the same exact time. This prevents the edges from drying out while waiting for the thicker parts of the meat to finish properly during the frying phase.
- Do not skip the step of shaking off excess flour and egg, as this prevents the breading from becoming soggy or separating from the meat surface. A light coating ensures the panko and parmesan stick directly to the chicken, creating a crisp, uniform exterior that stays perfectly intact.
- Work in small batches when pan-frying to maintain the oil temperature and prevent the skillet from becoming overcrowded, which would result in steaming instead of frying. If you crowd the pan, the chicken will release its juices and ruin the potential for a beautiful, golden, and crispy crust.
- Use a high-quality parmesan cheese that you grate yourself to avoid the anti-caking agents found in pre-shredded varieties which can inhibit proper melting and adhesion. Freshly grated cheese melts smoothly into the breadcrumbs, creating a much more cohesive and flavorful crust that browns more evenly in the pan.
- Let the breaded chicken rest for five minutes after the dredging process before you begin to fry them in the hot oil of the skillet. This short resting period allows the coating to bond effectively to the surface, which ensures that you do not lose any delicious crust when you flip the chicken.
The single most important technique in this entire recipe is managing the heat level of your skillet to achieve the perfect balance between browning and cooking. If your oil is too cold, the chicken will absorb excessive grease, but if the heat is too high, the cheese will burn before the meat is cooked. Aim for a steady medium-high heat that keeps the breadcrumbs sizzling gently, and be prepared to adjust your burner dial as needed throughout the cooking duration.
Serving Suggestions and Variations
Pairing with Sides
This versatile chicken dish pairs beautifully with a variety of textures and flavors, making it a reliable staple for any meal occasion. Serve it alongside a fresh Simple Green Salad to provide a light, acidic contrast to the richness of the crispy parmesan crust. Alternatively, place the chicken over a bed of Garlic Butter Pasta to create a hearty meal that absorbs all the savory drippings from the pan. For a more sophisticated presentation, serve it with Lemon Herb Risotto to enjoy the creamy rice base against the crunch of the chicken.
Creative Variations
If you prefer a spicy kick, add one tablespoon of chili powder or cayenne pepper to your flour mixture during the initial dredging stage of the preparation. This variation pairs exceptionally well with a cooling dipping sauce made from yogurt and fresh herbs to balance the heat. You can easily adjust the intensity by adding more or less heat depending on your personal preference for spicy food.
You can swap the chicken breasts for thick-cut veal cutlets or even firm white fish fillets if you want to diversify your protein intake throughout the week. These variations follow the exact same breading and frying technique, though cooking times will differ significantly based on the thickness of the protein selected. Ensure you adjust the timing accordingly to avoid overcooking or undercooking these more delicate alternatives while maintaining the integrity of the crust.
For further inspiration, check out our collections for Easy Weeknight Meals and One-Pan Wonders to find more dishes that fit into your busy schedule. You can also explore our guide to Healthy Dinner Favorites for additional protein-rich recipes that the whole family will love. To complete your dining experience, serve a chilled Vanilla Berry Parfait as a light and refreshing dessert that will satisfy any sweet craving.
Nutritional Information
These are approximate values per serving based on standard ingredient sizes and typical preparation methods for a four-serving recipe.
| Nutrient | Amount per Serving |
|---|---|
| Calories | 480 kcal |
| Protein | 38g |
| Fat | 22g |
| Carbohydrates | 28g |
| Fiber | 2g |
| Sugar | 1g |
| Sodium | 650mg |
These are approximate values and may vary depending on specific ingredients used.
FAQ
Can I use gluten-free flour for this recipe?
You can definitely substitute the all-purpose flour with a high-quality gluten-free all-purpose flour blend without any issues. This swap does not change the structural integrity of the breading process or the final texture of the chicken crust. Ensure you follow the same dredging technique to maintain a thin, even layer of coating on the meat. The taste remains identical, making this a perfect modification for those with gluten sensitivities or specific dietary needs.
How long can I store leftover chicken?
Leftover chicken can be safely stored in an airtight container within the refrigerator for up to three days after cooking. To maintain the crispness, it is best to reheat the chicken in an oven or toaster oven rather than using a microwave. Microwaving will soften the crust significantly, leading to a texture that is less desirable than fresh. You should always ensure the chicken reaches an internal temperature of 165 degrees Fahrenheit before serving it again.
Can I prepare the breaded chicken ahead of time?
You are able to prepare the breaded chicken ahead of time by keeping the coated cutlets in the refrigerator for up to four hours before cooking. Place them on a parchment-lined tray and cover them loosely with plastic wrap to protect the breading from drying out. This method is excellent for busy households that want to minimize active prep time right before the actual mealtime. When you are ready to eat, simply remove them from the fridge and fry them immediately in the hot skillet.
What should I do if the crust is browning too quickly?
If the crust is browning too fast, you must immediately reduce the heat on your stovetop to prevent the parmesan from burning before the chicken is cooked. A quick trick is to move the skillet to a cooler burner or lift it off the heat for thirty seconds to allow the temperature to stabilize. You can also finish cooking the chicken in a preheated oven at three hundred fifty degrees Fahrenheit until the internal temperature is correct. This ensures the center is cooked through perfectly without compromising the exterior flavor of the crispy coating.
Is there a vegetarian-friendly way to adapt this dish?
You can adapt this dish for vegetarians by replacing the chicken breasts with thick slices of firm eggplant or portobello mushrooms. These alternatives provide a meaty texture that works beautifully with the savory parmesan and panko crust when pan-fried using the same steps. Ensure the vegetables are sliced thinly and properly seasoned before you begin the breading process to maximize their flavor. This makes for a delicious, hearty vegetarian main course that retains the essence of the original crispy parmesan recipe perfectly.
Crispy Parmesan Crusted Chicken
Ingredients
Method
- Place the chicken breasts between sheets of plastic wrap and pound to an even 1/2-inch thickness.
- Set up three shallow bowls: one with flour, one with beaten eggs, and one with a mixture of panko and parmesan.
- Season the chicken breasts with kosher salt and black pepper.
- Dip each piece of chicken into the flour, shaking off excess.
- Dip the floured chicken into the beaten eggs, letting excess drip off.
- Press the chicken firmly into the panko-parmesan mixture until evenly coated on both sides.
- Heat the olive oil in a large skillet over medium-high heat.
- Place the chicken in the skillet and cook for 3-4 minutes per side until golden brown and cooked through.
- Transfer to a paper-towel-lined plate and serve immediately.