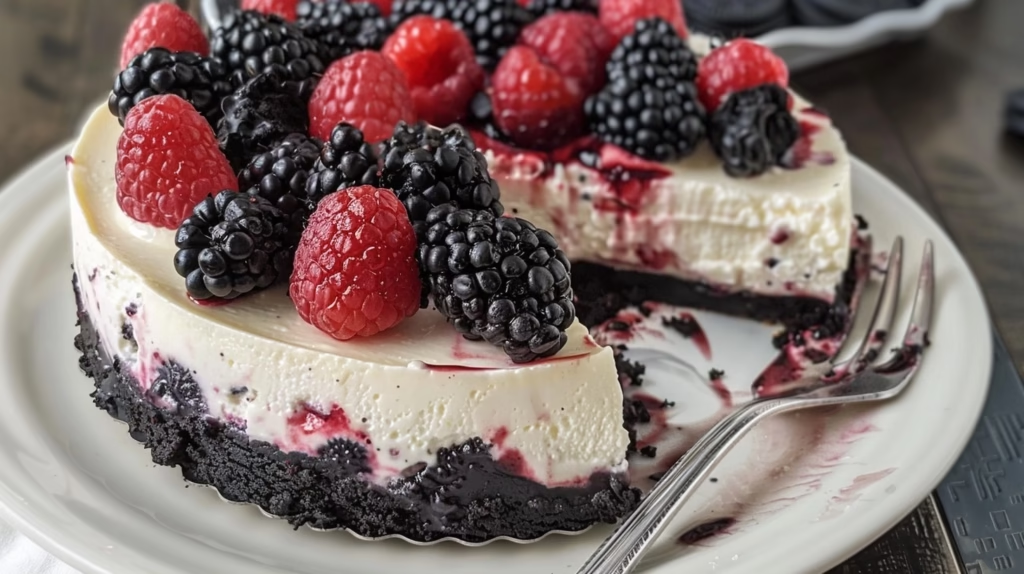
The no-bake Oreo berry cheesecake provides a rich and velvety dessert experience that combines a crunchy chocolate crust with a light, fruity filling. This simple yet impressive treat requires no oven time and relies on high-quality chilled ingredients to achieve a professional finish. It serves as an ideal solution for home bakers looking for maximum flavor with minimal effort during warm seasons or busy weeknight evenings.
Introduction to No-Bake Oreo Berry Cheesecake
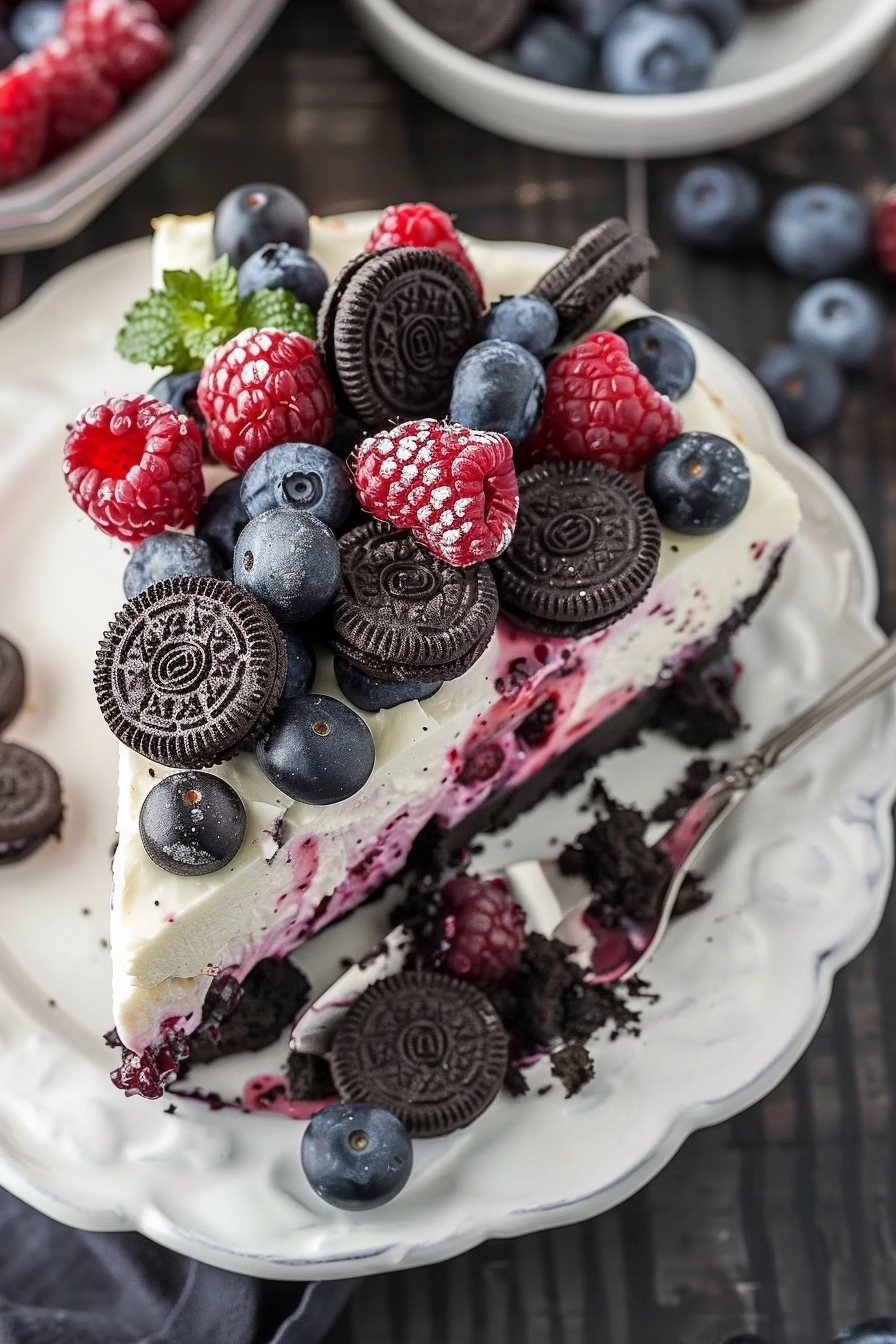
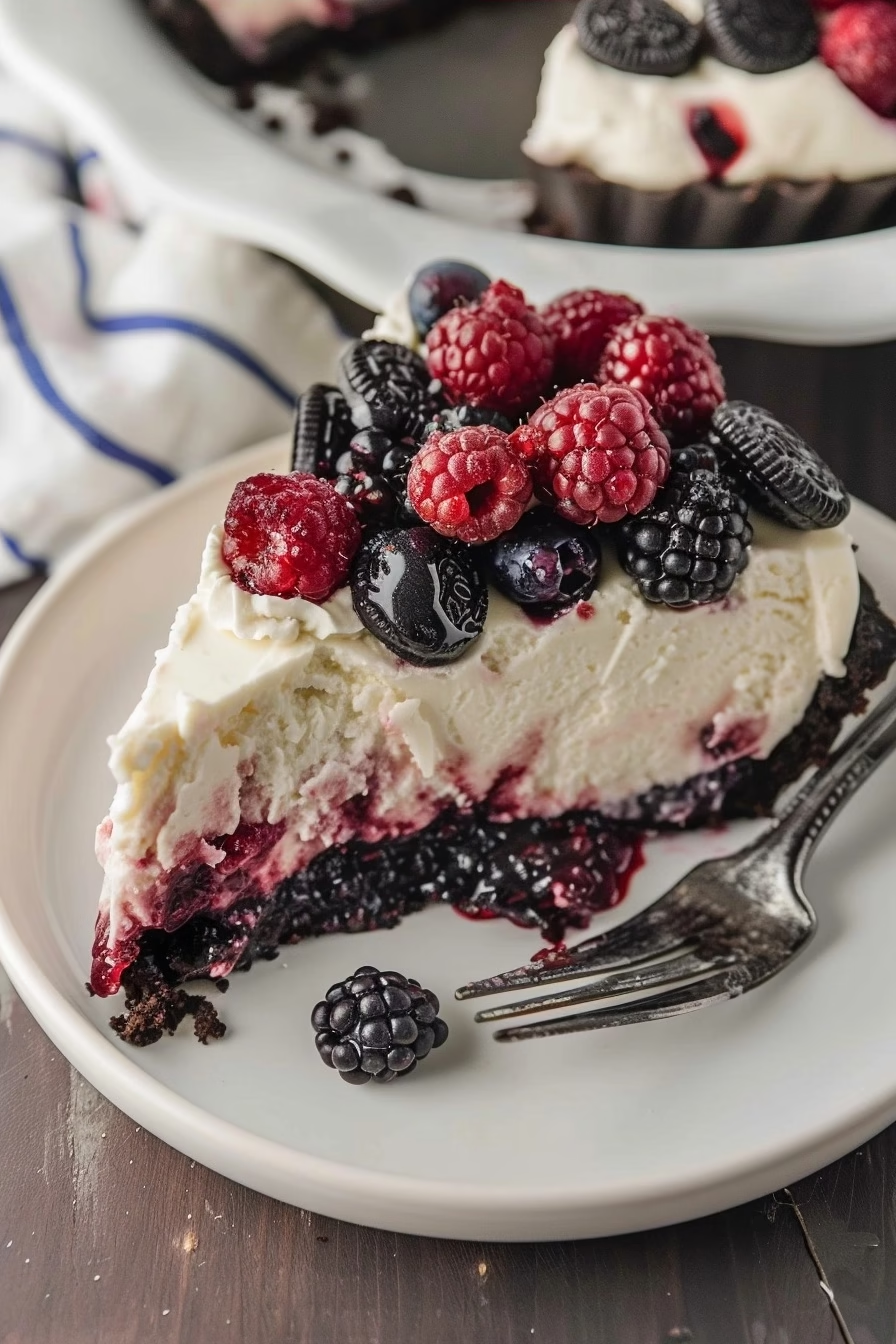
This dessert features a dark, crushed chocolate cookie base that provides a sturdy and slightly salty foundation for the sweet, tangy cheesecake layer. The filling incorporates fresh berries folded into a whipped cream and cream cheese base to ensure every bite offers a balanced contrast of flavors. You will notice a pleasant, slightly floral aroma from the vanilla bean extract that permeates the entire dessert while it sets in your refrigerator. Each slice cuts cleanly to reveal layers of contrasting colors that make it look like a masterpiece from a professional pastry kitchen.
The culinary history of no-bake cheesecakes dates back to mid-century kitchens where homemakers sought efficient ways to create elegant desserts without heating up the entire house. Unlike traditional baked cheesecakes that require a water bath and hours of careful monitoring, this version relies on the science of gelatin to provide structural integrity. It stands out from similar recipes because it avoids the dense, heavy profile of classic baked versions in favor of a cloud-like, airy mouthfeel. This technique allows the fresh flavors of the berries to shine through without being masked by excessive sugar or a heavy egg-based custard.
This specific recipe is designed for busy parents, university students, and beginner bakers who want to impress guests without spending hours in front of a hot stove. It suits casual family gatherings, birthday celebrations, or as a sophisticated ending to a weeknight meal when you crave something special. You will find that mastering this simple dessert earns it a permanent place in your weekly rotation because it is endlessly adaptable and consistently satisfying. Anyone with basic kitchen tools can achieve professional results simply by following the chilled assembly process outlined in the steps below.
Why You’ll Love This Recipe
The key technique of folding whipped cream into the softened cream cheese ensures the filling achieves a stable yet incredibly light texture that melts on the tongue. You will appreciate how the vanilla extract rounds out the sharpness of the cream cheese, creating a harmonious flavor profile that pairs perfectly with the tartness of the fresh blueberries. This combination of ingredients ensures a luxurious payoff that feels much more expensive than the simple components used to create it.
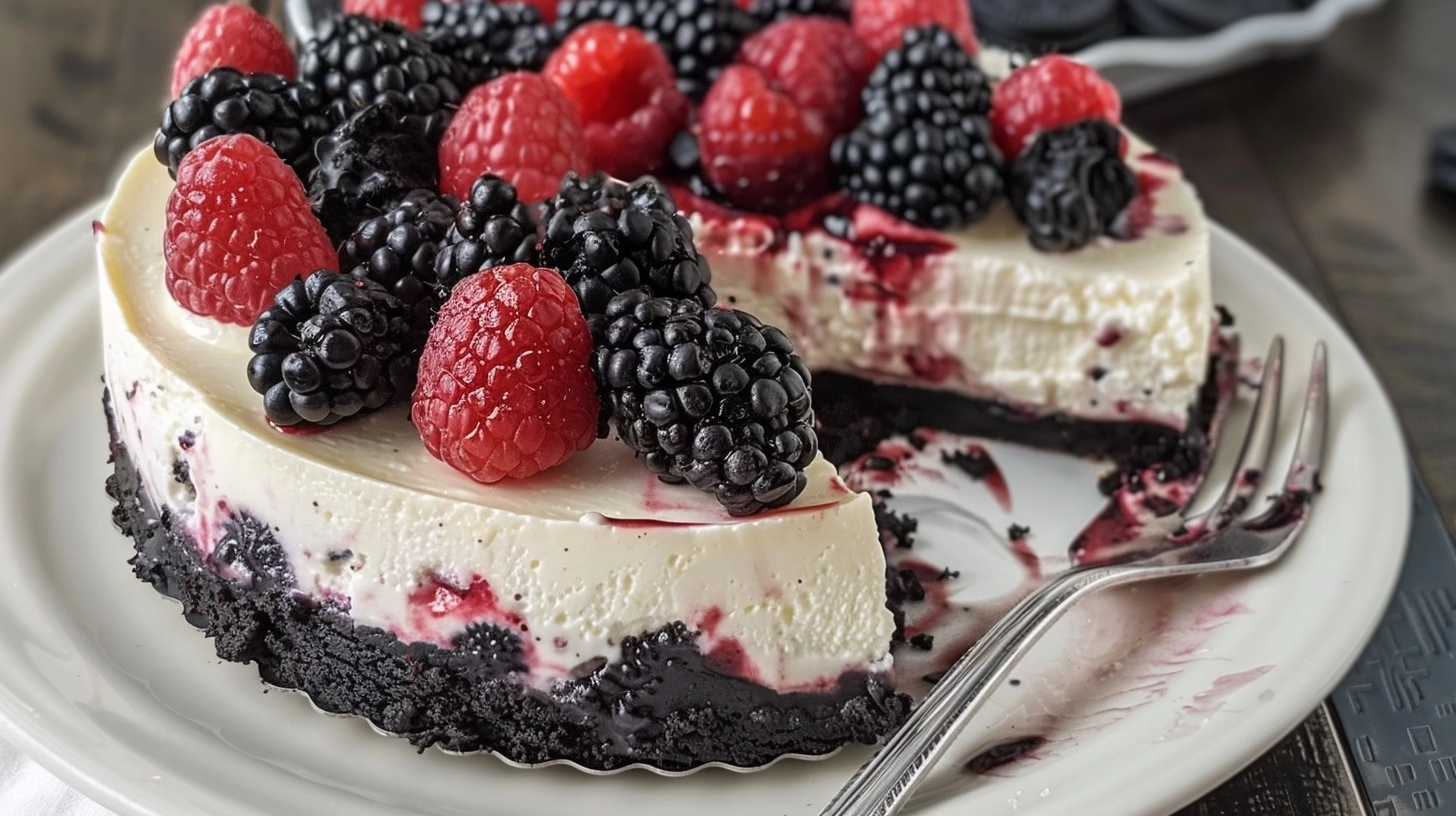
You will enjoy the striking visual contrast between the jet-black cookie base, the snowy white cheesecake filling, and the deep, vibrant purple of the fruit topping. This dessert satisfies on multiple levels by providing a satisfying crunch, a creamy middle, and a burst of fruit-forward acidity in every single bite. It represents the perfect intersection of ease and elegance, making it a reliable favorite for anyone who values time efficiency in the kitchen.
The Perfect Weeknight Dinner
Preparing this dish is incredibly efficient because it requires less than 45 minutes of active kitchen time to assemble the crust and filling. You simply mix, press, and pour the ingredients before letting the refrigerator handle the heavy lifting of setting the texture overnight. This streamlined approach makes it the ultimate dessert choice when you need a high-impact finish to a meal without the stress of oven timers.
This recipe works perfectly for meal prep because it stays fresh in the refrigerator for several days, allowing you to slice off a portion whenever cravings strike. Busy families often appreciate the ability to make this dessert well in advance, which frees up precious oven space for the main course during larger dinner gatherings. Even if you are a beginner cook, the straightforward instructions ensure you will achieve a perfect consistency every time you decide to make it.
Ingredients Needed for No-Bake Oreo Berry Cheesecake
Gather these high-quality components to ensure your cheesecake has the correct structure and flavor profile for the best results.
Main Ingredients
The following table outlines the essential items required to construct the foundation and filling of your dessert.
| Ingredient | Quantity | Notes |
|---|---|---|
| Oreo crumbs | 1.5 cups | Base flavor |
| Butter | 0.25 cup | Binder for crust |
| Cream cheese | 8 ounces | Adds body |
| Powdered sugar | 0.75 cup | Sweetener |
| Vanilla | 0.75 tsp | Aromatic depth |
| Heavy cream | 1 cup | Whipped aeration |
| Gelatine | 1 tbsp | Structural agent |
| Milk | 2 tbsp | Gelatine activator |
| Blueberries | 0.5 cup | Filling texture |
Optional Add-Ins
Customization allows you to tailor the flavor intensity and texture of the cheesecake to your specific personal preferences. Consider adding these items to elevate the standard recipe with unique twists or enhanced flavor profiles.
| Ingredient | Quantity | Notes |
|---|---|---|
| Lemon zest | 1 tsp | Citrus brightness |
| White chocolate | 0.25 cup | Added richness |
| Mint leaves | 1 tbsp | Fresh cooling |
| Almond extract | 0.25 tsp | Nutty undertones |
Ingredient Substitutions
- Instead of Oreo crumbs, use graham cracker crumbs combined with cocoa powder to achieve a similar chocolate flavor profile with a slightly different texture.
- Substitute heavy cream with full-fat coconut cream if you require a dairy-free alternative, though note that the texture will become slightly firmer when chilled.
- Replace blueberries with chopped strawberries or raspberries to change the fruit profile, which will alter the final sweetness and acidity levels accordingly.
- Swap granulated sugar in the topping with honey or maple syrup to provide a more natural, complex sweetness that changes the overall mouthfeel.
Step-by-Step Cooking Instructions
This recipe follows a logical flow of building the foundation first and then preparing the delicate mousse layer. Please ensure all ingredients are at the correct temperature before starting to guarantee the smoothest results.
Preparing the Cookie Base
Combine your crushed cookies and melted butter in a bowl until the mixture resembles wet sand that holds its shape when squeezed. Press this mixture firmly into the bottom of an 8-inch springform pan to ensure it creates a solid, uniform layer. You should use the back of a measuring cup to compress the crumbs so they do not fall apart when you serve the final dish. Place the pan in the refrigerator immediately to allow the butter to solidify and create a firm, crunchy foundation.
Creating the Cheesecake Filling
Beat the softened cream cheese with the sugar and vanilla in a medium bowl until the mixture is completely smooth and free of lumps. In a separate chilled bowl, whip the heavy cream until stiff, glossy peaks form that stand straight up when you lift the beaters. Dissolve the gelatine in warm milk according to the instructions, then gently whisk a small amount of the cream cheese base into the gelatine to temper it before folding everything together. Finally, fold the whipped cream and fresh blueberries into the mixture using a rubber spatula to preserve the air bubbles for a light, professional texture.
Assembling and Topping
Pour your prepared filling over the chilled cookie base and smooth the surface with an offset spatula to create an even layer. Cover the pan tightly with plastic wrap and let it set in the refrigerator for at least five hours to ensure the gelatine fully stabilizes the structure. While it sets, simmer the blueberries with sugar, cornstarch, and lemon juice in a pot until the sauce thickens and coats the back of a spoon. Let the topping cool completely before pouring it over the chilled cheesecake just before you plan to serve it to your guests.
Pro Tips
Successful dessert making relies on precise execution and careful attention to the small details that influence the final texture of the dish. Follow these professional recommendations to ensure your cheesecake turns out perfect every single time you prepare it.
- Always allow the cream cheese to reach room temperature before beating, as cold cream cheese will remain lumpy and ruin the smooth consistency of your filling. Room temperature ingredients emulsify much more easily and provide a uniform, professional mouthfeel in every bite.
- Ensure you do not overheat the gelatine mixture, as this will lead to a rubbery texture that is difficult to cut and unpleasant to eat. The gelatine only needs to reach the point of dissolution, so watch the pot carefully and remove it from the heat immediately.
- Use a high-quality heavy cream with at least 30 percent fat content to ensure you get stable, thick whipped cream for the filling. Lower fat options will not aerate properly and will result in a runny or thin cheesecake that fails to set firmly.
- Press the cookie base as tightly as possible using a flat-bottomed glass to prevent the crust from crumbling during the slicing process. A well-packed base serves as the structural anchor for the entire dessert and prevents messy service.
- Wait until the very last moment to add the fruit topping, as the acidity can sometimes soften the surface of the cheesecake if left sitting too long. Freshly added toppings look much more appealing and maintain their vibrant color and texture for the best presentation.
The most important technique in this recipe is the gentle folding process used to combine the whipped cream with the cream cheese mixture. If you mix too aggressively, you will deflate the air bubbles and lose the light, airy texture that makes this dish so enjoyable. Always use a large rubber spatula and work in a circular motion until the ingredients are just combined for the best results.
Serving Suggestions and Variations
Pairing with Sides
Serve this cheesecake alongside a hot cup of black coffee or a delicate herbal tea to balance the richness of the cream cheese. If you are hosting a larger gathering, consider adding a scoop of Vanilla Bean Sorbet or a small dish of Fresh Berry Compote to enhance the fruit flavors. A light Lemon Shortbread Cookie also makes an excellent side if you want an extra texture contrast that isn’t too heavy. These pairings help cleanse the palate between bites and highlight the nuances of the creamy filling and crunchy base.
Creative Variations
You can introduce heat to the blueberry topping by adding a pinch of ground ginger or cardamom to the mixture before boiling. This simple addition provides a sophisticated depth that cuts through the creaminess of the filling in an unexpected way. Ensure you add these spices sparingly to avoid overwhelming the delicate flavor of the berries.
Swap the blueberries for blackberries or pitted cherries to change the final flavor profile and visual appeal of the dessert. This substitution works seamlessly with the standard base, allowing you to use whatever fruit is currently in season at your local market. Each fruit variation brings a unique level of acidity and sweetness that changes the overall experience of the dish.
Explore more of our dessert collection by trying our Classic Chocolate Mousse or our No-Bake Lemon Bars for your next weekend project. Finish your dessert spread with a batch of Whipped Cream Topping to add a final touch of decadence. All of these recipes are designed to pair beautifully with this cheesecake to create a complete and memorable dessert buffet.
Nutritional Information
These values represent an approximate analysis based on a standard serving size for one slice of the cheesecake.
| Nutrient | Amount per Serving |
|---|---|
| Calories | 380 |
| Protein | 5g |
| Fat | 22g |
| Carbohydrates | 42g |
| Fiber | 2g |
| Sugar | 28g |
| Sodium | 210mg |
These are approximate values and may vary depending on specific ingredients used.
FAQ
Can I use low-fat cream cheese for this recipe?
You should avoid using low-fat cream cheese because it lacks the necessary fat content to maintain a stable structure. Full-fat cream cheese provides the density and richness required to ensure the cake sets properly in the refrigerator. Using a lower fat alternative will likely result in a runny filling that fails to hold its shape when sliced. For the best culinary results, stick with the recommended full-fat variety to ensure a professional and delicious outcome.
Is this recipe suitable for a vegetarian diet?
This recipe is perfectly suitable for a vegetarian diet because it contains no meat or animal derivatives beyond dairy products. You can safely serve this to vegetarians who consume dairy as part of their regular meal plan. The gelatin used for setting the filling is the only ingredient that requires checking if you adhere to a strict diet. Look for high-quality, plant-based gelling agents like agar-agar if you need to strictly avoid animal-sourced gelatin entirely.
How long can I store this in the refrigerator?
You can safely store this cheesecake in an airtight container for up to three days in your refrigerator. After this period, the crust may begin to lose its signature crunch and become soft due to moisture absorption from the filling. We recommend covering the pan tightly with plastic wrap to prevent the filling from picking up odors from other items in your fridge. Always ensure it remains chilled until the very moment you are ready to serve it to maintain the best quality.
Can I make this dessert ahead of time for a party?
You can certainly make this dessert ahead of time, and it actually benefits from an overnight stay in the refrigerator. Preparing it the night before ensures the flavors meld together and the gelatin sets firmly for perfect, clean slices every time. Simply assemble the cheesecake and let it chill until you are ready to add the topping and serve it. This strategy is an excellent way to reduce your stress when planning a large party or event.
What should I do if my filling looks lumpy?
If your filling looks lumpy, it usually means the cream cheese was not at the correct temperature before you started the mixing process. You can gently warm the mixture slightly or continue to beat it on a medium speed until the lumps disappear into the cream. Do not worry if it looks slightly thick, as the gelatin will help pull everything together once it begins to cool. Following the instructions to soften the cream cheese for thirty minutes is the best way to prevent this issue entirely.
No-Bake Oreo Berry Cheesecake
Ingredients
Method
- Mix crushed cookies with melted butter and press firmly into the bottom of a 9-inch springform pan; chill for 30 minutes.
- In a large bowl, beat the softened cream cheese, sugar, and vanilla extract until smooth.
- Slowly fold in the dissolved gelatin mixture.
- In a separate chilled bowl, whip the heavy cream to stiff peaks and gently fold it into the cream cheese mixture.
- Fold in the fresh berries.
- Pour the filling over the prepared crust and smooth the top with a spatula.
- Refrigerate for at least 4 hours or until completely set before serving.