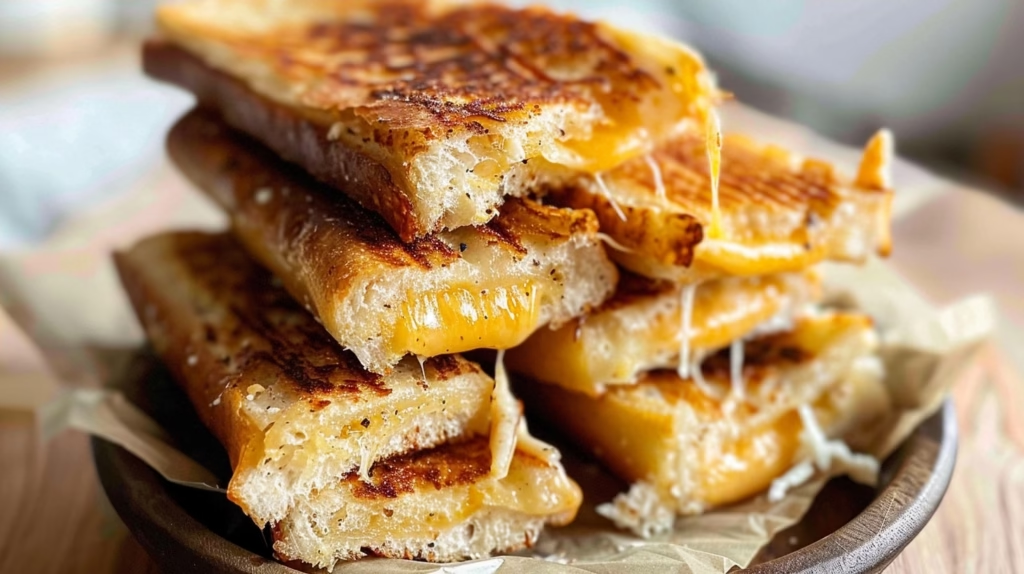
Grilled Cheese Roll-Ups represent a fun and crunchy twist on the classic sandwich, delivering molten cheese wrapped in a perfectly toasted golden exterior. This inventive preparation transforms standard comfort food into bite-sized finger foods that satisfy both children and adults alike with every crispy, buttery mouthful you consume.

Introduction to Grilled Cheese Roll-Ups
These bite-sized snacks provide a unique sensory experience by concentrating the best parts of a grilled sandwich into a compact and portable form. The golden, buttery crust offers a satisfying crunch that yields to a warm, gooey interior of melted cheddar cheese. Every roll-up releases a savory aroma that instantly signals comfort, making them an ideal choice for quick lunches or casual snacking moments. You will find that the smaller surface area creates a higher ratio of toasted bread to melted cheese compared to traditional sandwiches.
The concept of rolling bread to create appetizers has roots in various culinary traditions that seek to minimize waste while maximizing textural appeal. By removing the crusts and flattening the bread, you create a versatile canvas that holds structural integrity throughout the frying process. This method distinguishes itself from standard sandwiches by providing a consistent, uniform crunch across every single inch of the bread surface. It is a brilliant example of how simple technique changes can completely alter the eating experience of humble, everyday pantry staples.
This recipe suits busy individuals, families with energetic children, and anyone looking to spice up their lunch routine with something visually engaging. Whether you are hosting a casual game night or simply need a fast meal, these roll-ups provide a dependable and crowd-pleasing option for your weekly rotation. Their compact size makes them incredibly easy to handle, ensuring they become a permanent fixture in your kitchen because they provide consistent satisfaction without requiring complex ingredients or specialized culinary skills.
Why You’ll Love This Recipe
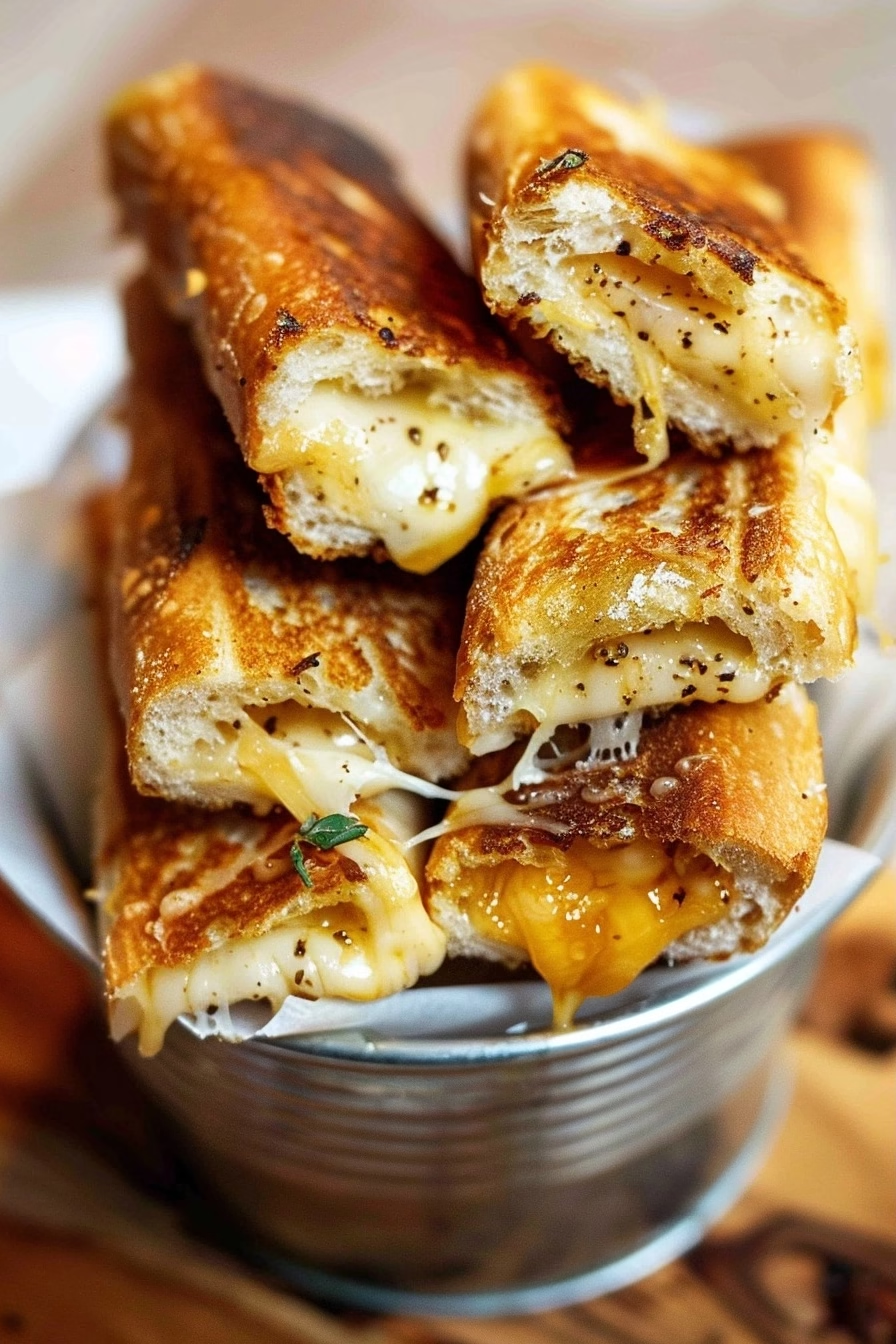
The primary appeal of this recipe lies in the masterful combination of finely grated cheddar and the precise technique of rolling the bread tightly. This specific approach ensures that the cheese melts evenly while the bread browns rapidly without becoming excessively oily or soggy during the process. You will appreciate the intense flavor payoff that comes from frying the bread until it reaches a deep, vibrant gold color.
You will certainly enjoy the extreme texture contrast provided by the crispy exterior shells paired with the soft, stretchy interior cheese filling. The visual appeal of these golden rolls makes them an excellent addition to any platter when entertaining guests who appreciate simple, high-quality comfort snacks. These snacks satisfy cravings on multiple levels, hitting that perfect balance between salty, fatty, and crunchy notes in every single bite you take.
The Perfect Weeknight Dinner
Preparing this dish is incredibly simple and requires very little active time, allowing you to have a warm dinner ready in under 45 minutes. With only a few foundational steps, you can move from opening your refrigerator to serving a hot, delicious meal to your family members. The streamlined process ensures you spend more time enjoying the food and less time standing over the stove monitoring complex cooking procedures.
This recipe works exceptionally well for meal prep, busy families who need fast solutions, or beginner cooks looking to master basic frying techniques. Because the ingredients are so accessible, you can easily scale the portions up or down to accommodate unexpected guests or a quick individual lunch. Its reliability as a quick, hot meal means it remains a top contender for those evenings when you need something nourishing without a long, drawn-out preparation time.
Ingredients Needed for Grilled Cheese Roll-Ups
Main Ingredients
The following table outlines the foundational components required to construct these delicious, crispy roll-ups in your own kitchen.
| Ingredient | Quantity | Notes |
|---|---|---|
| Soft White Bread | 8 slices | Base structure |
| Cheddar Cheese | 1.5 cups | Provides creaminess |
| Butter | 2 tbsp | Adds golden color |
Optional Add-Ins
Customization allows you to tailor these snacks to your specific palate preferences or to utilize ingredients already present in your pantry. Adding these simple extras enhances the flavor profile significantly without complicating the assembly or the final cooking time.
| Ingredient | Quantity | Notes |
|---|---|---|
| Garlic Powder | 1 tsp | Adds savory depth |
| Dried Parsley | 0.5 tsp | Provides fresh color |
| Chili Flakes | 0.25 tsp | Adds mild heat |
| Smoked Paprika | 0.25 tsp | Enhances smoky notes |
Ingredient Substitutions
- Use sourdough bread instead of soft white bread to introduce a tangy flavor and a slightly firmer, chewier texture to the roll-up.
- Replace cheddar with mozzarella cheese if you prefer a milder taste and a much longer, more dramatic cheese pull when you bite in.
- Swap melted butter for olive oil if you want to experiment with a lighter, fruitier flavor profile that pairs well with Mediterranean herbs.
- Try using whole wheat bread for a slightly nuttier flavor profile, although you may need to flatten it more forcefully for proper rolling.
Step-by-Step Cooking Instructions
Achieving the perfect texture requires careful attention to the rolling process and heat management throughout the frying duration. Follow these precise phases to ensure your roll-ups achieve that iconic golden-brown finish while maintaining a perfectly melted center.
Preparing the Base
Start by slicing the crusts off of each slice of white bread to create uniform rectangles that roll smoothly without tearing. Use a heavy rolling pin to flatten each slice of bread until it is thin, dense, and ready to hold the filling securely. Sprinkle a generous pinch of shredded cheddar onto each piece, leaving a small strip at one end completely clear for sealing. This empty strip is vital because it allows the butter to bond the edges together and prevents the roll from unraveling during the frying phase.
Rolling and Assembly
Carefully roll each piece of bread from the covered end toward the clean strip, keeping the roll as tight and compact as possible. Once the roll is formed, brush a tiny amount of melted butter along the clear strip to act as a natural edible glue. Place the roll seam-side-down immediately so that the weight of the roll keeps it closed while you prepare the remaining slices. Ensure every roll is brushed lightly all over with melted butter, as this fat is what creates the deep, delicious golden color during the frying process.
Frying the Roll-Ups
Heat your dry pan to a low-medium temperature, which prevents the exterior from burning before the cheese has a chance to fully melt. Carefully add your roll-ups to the pan with the seam facing downward, allowing the heat to seal the edge shut instantly. Frequently turn the rolls with your tongs to ensure every side develops an even, crispy, golden-brown crust without any dark or burnt spots appearing. You know they are finished when the bread is uniformly crisp and you see the molten cheddar beginning to leak from the ends of the cylinders.
Pro Tips
Focusing on heat management is the absolute best way to ensure consistent results every time you prepare this recipe. These small adjustments prevent common issues and elevate the quality of your finished snack to a professional standard.
- Use a heavy-bottomed cast iron skillet to distribute heat evenly across the pan surface during the entire cooking time. This consistent heat distribution ensures that every single roll-up browns at the same rate and avoids uneven cooking.
- Always keep the heat on a low-medium setting because higher heat will scorch the butter before the cheese melts inside. Lower heat provides the necessary time for the thermal energy to penetrate the center of the roll-up effectively.
- Grate your cheddar cheese freshly from a block instead of using pre-shredded bags to ensure maximum creaminess and better melting. Pre-shredded cheese is coated in starches that inhibit melting and result in a grainier texture inside your crispy roll.
- Place the rolls seam-side-down in the pan initially so the heat seals the edges and prevents the roll from unrolling. This simple trick provides structural stability that makes the rest of the cooking process much easier to manage.
- Avoid overcrowding your pan by cooking in two smaller batches if you have a large amount of rolls to prepare. Overcrowding drops the pan temperature too quickly and results in steamed bread rather than the desired crispy exterior shell.
The most important technique in this entire recipe is the rolling process itself, which dictates the structural integrity of your finished product. You must flatten the bread thoroughly so that it becomes pliable enough to roll without cracking or breaking at the edges. A tight roll ensures that the cheese stays inside while the butter-fried exterior creates a sturdy, delicious seal around the savory filling.
Serving Suggestions and Variations
Pairing with Sides
These crispy roll-ups pair perfectly with a cup of Creamy Tomato Basil Soup because the acidic tomato notes cut through the richness of the cheddar cheese. You might also serve them alongside a crisp Garden Fresh Salad to provide a light, crunchy contrast to the dense, warm cheese rolls. For a more substantial meal, adding a portion of Roasted Garlic Potatoes creates a comforting dinner experience that balances the textures perfectly. These three sides offer enough variety in temperature and flavor to make the meal feel balanced, satisfying, and complete for any hungry guest.
Creative Variations
If you prefer a spicy kick, add a generous teaspoon of diced jalapeños or red chili flakes into the cheese before rolling it up. You can also brush the exterior of the finished rolls with a mixture of melted butter and cayenne pepper for a bold, spicy finish. This adjustment adds a complex layer of heat that makes the snack even more exciting for those who enjoy adventurous flavors.
To change the protein profile, try adding finely diced leftover chicken or sautéed spinach into the center of the roll before you seal the bread. These additions transform a simple snack into a more nutrient-dense meal that provides lasting energy throughout your busy afternoon. Just ensure that any added ingredients are dry before assembly to maintain the structural integrity of the bread rolls.
For more inspiration, you can explore our collection of Easy Cheesy Appetizers or the hearty Comfort Food Classics series on our blog. Consider finishing your meal with a sweet treat like Warm Cinnamon Sugar Donuts to perfectly contrast the savory profile of the main course. These additions help you build a cohesive and memorable dining experience that keeps your family excited for every single meal you serve.
Nutritional Information
These values are approximate estimations based on the standard ingredients listed for a single serving of these delicious cheese roll-ups.
| Nutrient | Amount per Serving |
|---|---|
| Calories | 280 |
| Protein | 10g |
| Fat | 15g |
| Carbohydrates | 22g |
| Fiber | 1g |
| Sugar | 2g |
| Sodium | 450mg |
These are approximate values and may vary depending on specific ingredients used.
FAQ
Can I use whole wheat bread for this recipe?
You can certainly use whole wheat bread, although you should ensure the slices are soft and fresh for optimal rolling success. Whole wheat bread has a different fiber content that makes it slightly more resistant to flattening, so you may need to apply more pressure with your rolling pin. The flavor profile will lean slightly nuttier than white bread, which pairs exceptionally well with the sharp saltiness of the cheddar cheese. Simply proceed with the same rolling and frying instructions as outlined in the main recipe to achieve a delicious result.
Are these roll-ups suitable for a vegetarian diet?
These roll-ups are entirely suitable for a vegetarian diet as they do not contain any meat products or animal-derived ingredients other than dairy. You should ensure your cheddar cheese is certified vegetarian, as some brands use animal-based rennet during the production process. This snack provides a satisfying source of protein and comfort for vegetarians without requiring any complicated ingredient swaps or substitutions. You can confidently serve these to your vegetarian friends and family members at any casual gathering or dinner event.
How long can I store the leftovers?
Leftover roll-ups can be stored in an airtight container in your refrigerator for up to three days after the initial preparation. You should allow the rolls to cool completely to room temperature before placing them in the container to prevent condensation from making them soggy. When you are ready to eat them again, reheat them in a toaster oven or a dry pan to restore the crispy exterior texture. Microwave reheating is not recommended as it will result in a soft, chewy texture rather than the intended crunch.
Can I prepare the rolls ahead of time?
You can prepare the rolls up to four hours in advance by keeping them tightly wrapped in plastic wrap in your refrigerator until you are ready to cook. This make-ahead strategy is perfect for hosting, as it allows you to fry the rolls fresh just before your guests arrive at your home. Ensure you brush the exterior with butter immediately before adding them to the pan to maintain the best possible crust development. Storing them for longer than four hours may cause the bread to absorb too much moisture from the cheese, which could compromise the final texture.
What should I do if the bread breaks while rolling?
Bread breakage usually occurs because the bread is either too dry or you are not applying enough pressure during the initial flattening phase. If a slice breaks, you can gently pinch the edges together with a drop of water or butter to seal the tear before you continue rolling. Using the freshest possible soft white bread is the best way to prevent cracking throughout the entire assembly process. If the bread continues to break, try placing it in the microwave for five seconds to soften the fibers before you start flattening it.
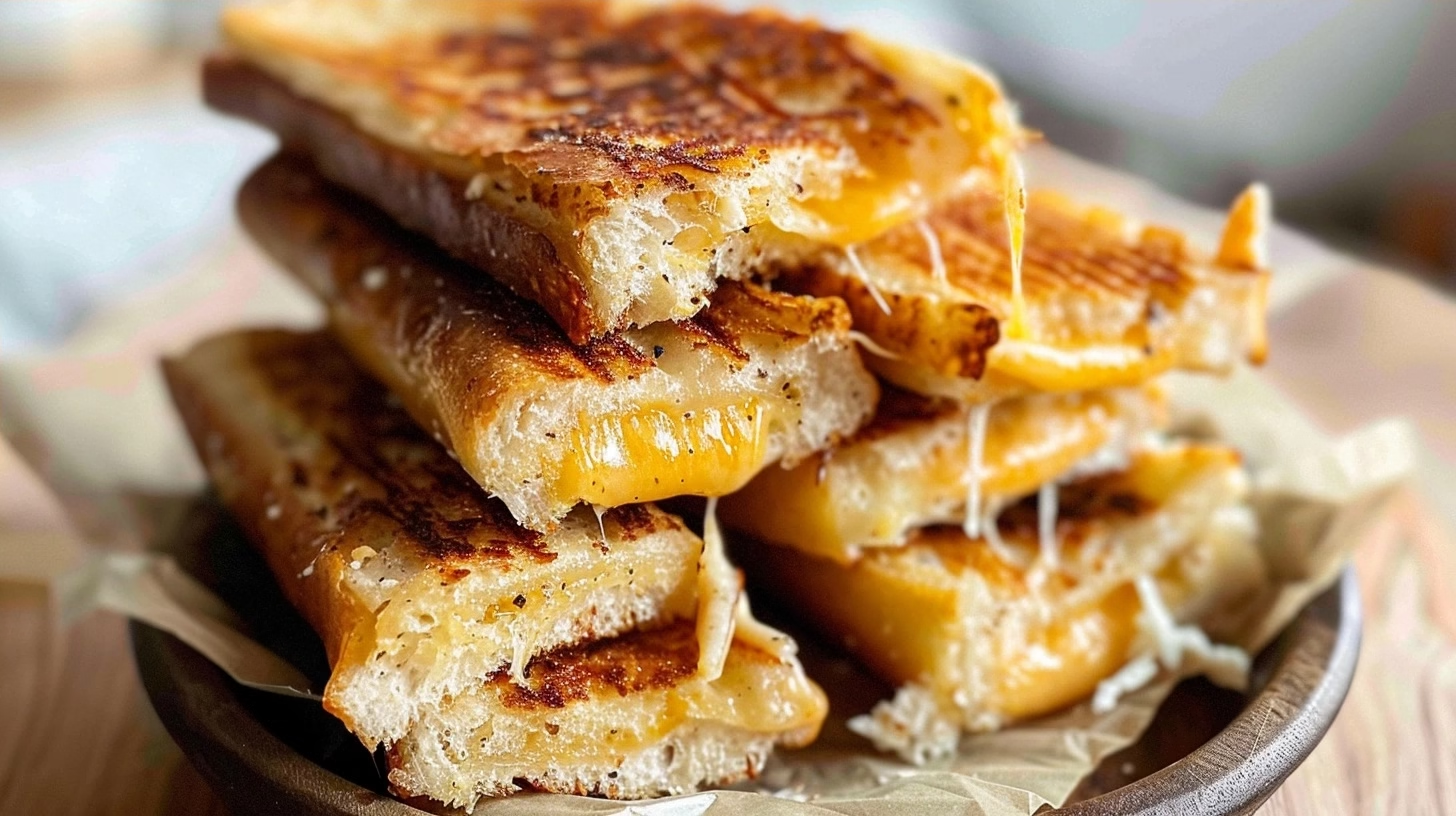
Crispy Grilled Cheese Roll-Ups
Ingredients
Method
- Trim the crusts off each slice of bread.
- Use a rolling pin to flatten each slice of bread until thin.
- Sprinkle a generous amount of shredded cheddar cheese onto the lower half of each flattened bread slice.
- Roll the bread up tightly to form a cylinder, ensuring the cheese is contained.
- Mix the softened butter with garlic powder if using.
- Heat a non-stick skillet over medium heat.
- Brush the exterior of each bread roll with a little bit of the butter.
- Place the rolls seam-side down in the skillet.
- Cook, turning occasionally, until all sides are golden brown and crispy and the cheese is fully melted.
- Serve warm.